Every 6000 miles the clearance on the valves needs to be checked, this would be the “BIG” service bill that you would normally encounter, not a lot of parts are required for this work but it can take a bit of time and can’t be rushed. Some folk leave it longer I’ve heard of up to 12-16K ?? a sure sign they need doing is bad starting and a lack a clatter, tappety noises from the to end.
There is a issue with soft valves, the inlets in particular can wear fast on some bikes the knock on from this is more frequent valve clearance checks. As the miles rack up and the required shims become thinner to get correct clearance the valve lip is becoming thinner, if taken too far the engine could drop a valve. During the valve clearance check if shims required are getting close to 2.40 or worse 2.30 new valves should be considered.
There is a Triumph tool available that allows you to remove the shims without disturbing the cam, it costs about 60+pounds but I was going to do things the old fashioned way and if any shims needed adjusting remove the cams to gain access to them.
Before I started the job there was a check list of tools and parts that I needed to go through
24mm/19mm socket
Micrometer/feeler gauges metric
Crankcase cover gasket
3 New spark plugs
RTV Silicone sealant
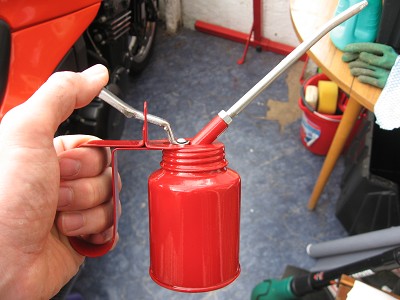
Oil can
Telescopic magnetic tool
Metal pick (small like a tooth pick)
Zip Tie
Torque wrench
Various torx and allen head sockets
12mm allen socket & Triumph spark plug removal tool
Brake cleaner/rags paper towel
First thing make sure the Bike is cold, a valve check has to be done with a cold bike other wise your readings will be out !!!!
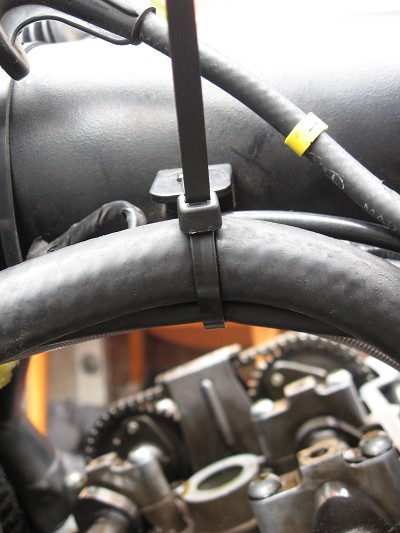
Now I was ready to start, I had read the Haynes a couple of times and searched the net a bit for advice, just to try and get to know the procedure. First up seat, body work and tank off, negative lead of the battery off. Zip tie the cables and tubes on the left of the main frame tube tightly up and out of the way of the cam cover like this..
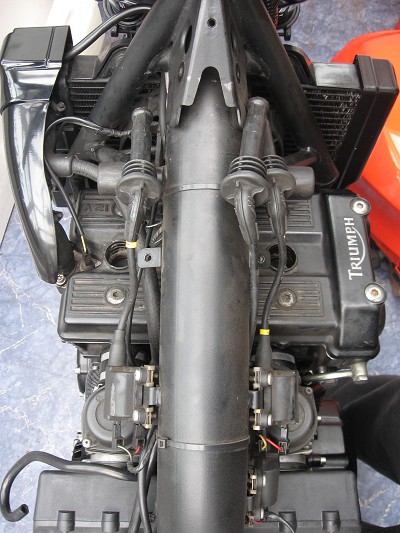
clean the top of the cam cover to remove any crap the pull the spark plug caps and rest them over the tank mounting bars like this…
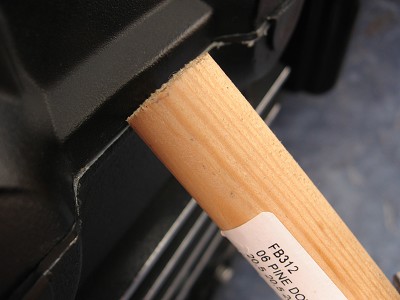
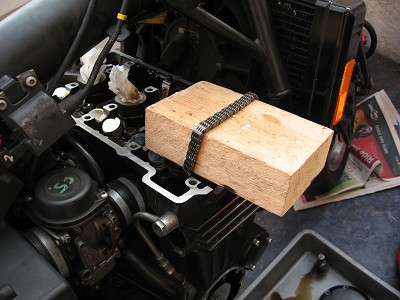
I’m now ready to remove the cam cover, the 8 cam cover bolts need to be loosened in a cris cross manner….(when loosening stuff like this, start from the outside and work your way in…when tightening stuff like this work from the center out) and remove them. The cam cover is now only held in place with the silicone sealant at each end. Take a mallet and a small piece of wood and gently tap the wood up against the under side edge of each end of the cam cover to loosen it…
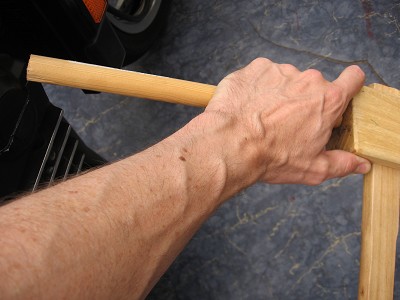
You can now carefully lift the cover upwards. It needs to come out the right hand side of the bike, I found twisting the cover towards the back of the bike as I did this allowed the half moon gasket end caps more room to come out between the cams, which ever way you find it is a tight fit.
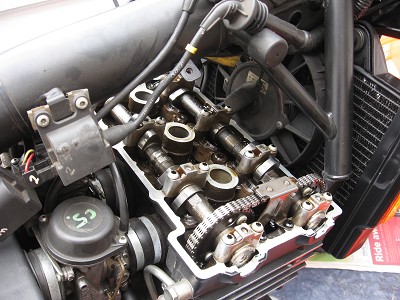
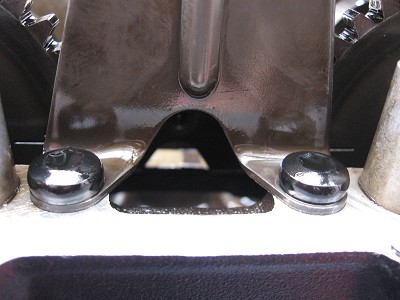
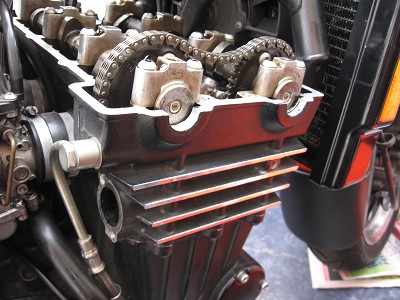
Eeeek the inside of my engine ! Next remove the crankshaft cover, Haynes says be ready for some oil loss at this point but don’t worry it’s only a dribble.
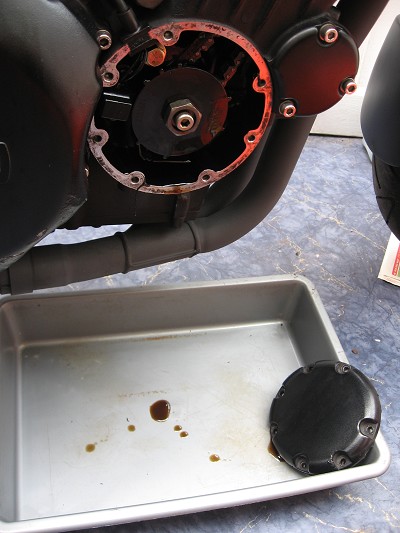
This is so you can gain access to the large nut on the end of the crankshaft to turn the engine over with by hand, also so you can see the timing marks necessary to put everything back together the right way should you need pull the cams.
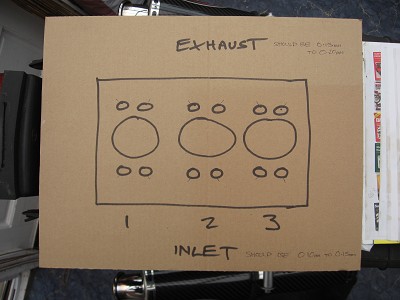
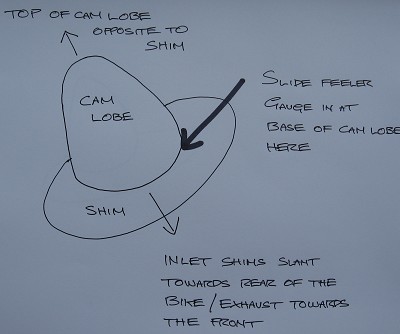
At this stage it’s best to make sure you are organized you will need to draw a diagram of the valves so you can note any readings and work out the necessary adjustments and note them too….here is mine
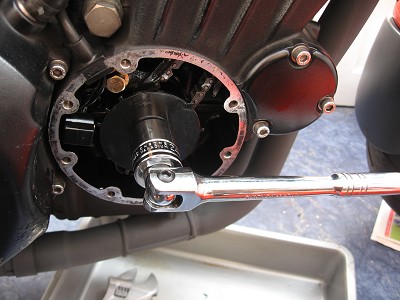
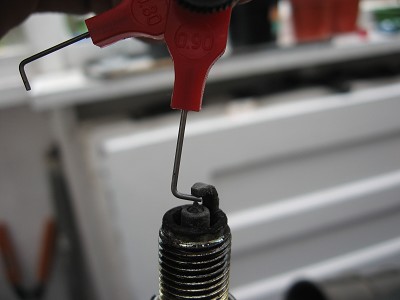
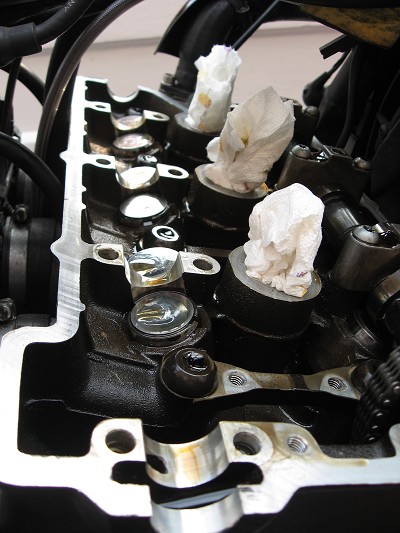
You will need a 24mm ring spanner or socket on a breaker bar or something to turn the engine over with, don’t use a ratchet as you can’t control the position of the timing marks or cam lobes as the pistons fall. You will now need to loosen or remove the spark plugs so no compression happens as the pistons rise, I removed mine because I wanted to check the gaps, condition and replace them, the gaps should be 0.8-0.9mm by the way, I then poked kitchen roll in the holes to stop any crap falling down there…..It’s much easier to get access to the plugs with the cam cover off as they are seated fairly deep into the top of the engine, the Triumph spark plug tool grips the plugs well and I use a 12mm allen socket which fits in the top a treat and allows me to get deep enough and also torque them down later properly
A couple more pictures to depict where we are at so far…
RIGHT STOP !……move the handle bars to the left, this will save you from regularly nutting the bar end weight as you peer along the exhaust cam…don’t ask me how I know that !!
Time to check those clearances they should be Exhaust valves 0.15mm to 0.20mm and inlet valves 0.10mm to 0.15mm…start with the valves on piston 1 (far left) and rotate the engine with the spanner clockwise until the top of the egg on the cam is opposite the shim beneath it, with the feeler gauges measure slide in a gauge until you find one that is a firm smooth sliding fit, don’t force it. Once you have the size of the gap measured note it on your valve chart and move onto the next…rotate engine until cam is pointing upwards and repeat
I will now subject you to my novice diagram as I forgot to take a picture at this stage….doh !
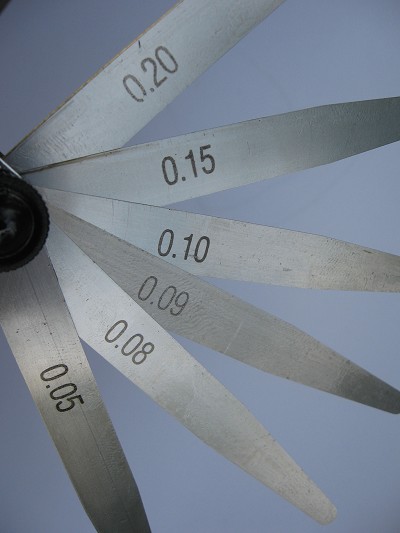
These were the sizes used on the feeler gauges
When you have finished note all the valves that are not within spec on your chart, on mine I had five that were not ok. Two exhaust and three inlet, this meant I was going to have to pull both cams as I didn’t have a shim removal tool.
To do this I have to rotate the engine to a set point so that everything comes out and goes back in the same place in the engines cycle…two points of reference are marked, one on the ignition rotor…
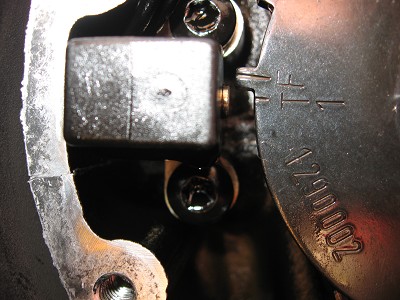
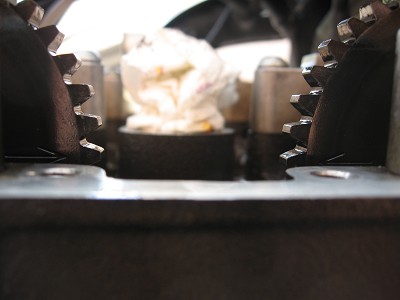
As you can see the T1 mark has to line up with the center of the pick up. then you have to have the two arrows on the cam shaft sprockets pointing towards each other and level with the top of the engine like this…
Now I can remove the cam chain tensioner, first loosen the 19mm nut on the end, I removed mine altogether, obviously this was a trap, as the spring within tried to make it’s escape, have a spare hand to slow it’s release..
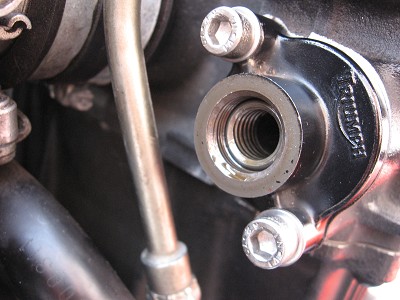
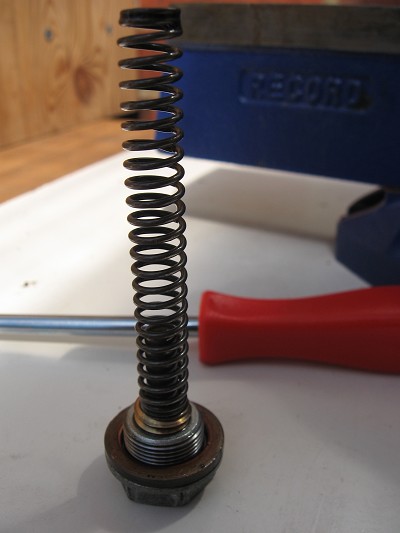
Remove the two mounting bolts and bring the tensioner out completely, press the catch in you’ll find if you push the end of the plunger a little the catch for the ratchet will be easier to press, retract the plunger all the way back into the body of the tensioner ready to go back in later.
Remove the four torx screws from the upper cam chain guide ( it sits between the two cam chain sprockets) and lift it off. Now the cam chain is not being held in place and if the cam chain guide has not released the tension on the chain (it may stick a bit) it may suddenly go with a bang and a clatter as the cam chain jumps off the sprockets and the guide bangs forwards in the cam chain tunnel, this is another trap ! so fore warned is fore armed !
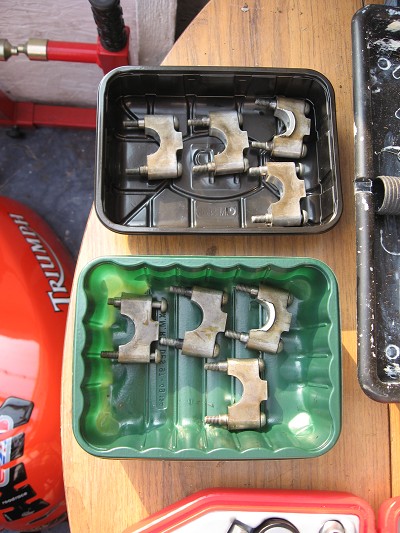
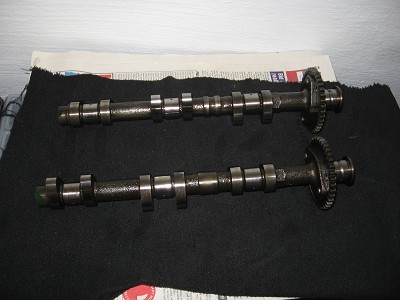
Tensioner off and top guide off, you can see the top run of the chain sagging as it is no longer under tension. Time to give the camshaft caps a little closer inspection, if you look you’ll see numbers scribed into the top of each of them and A B scribed into the top of the ones by the cam sprockets, make a note as to what goes where and which way round. Now working on the inlet cam start to loosen the cap retaining bolts in a criss cross the same as before, remove the caps and bolts watching out for the dowels that sit inserted between the caps and the cylinder head, place them in a safe place. Slip the cam chain off the cam sprocket and carefully remove the cam shaft, do the same for the exhaust cam but be aware that you will need to have a piece of wood handy to rest under the chain, this will stop it falling down the cam chain tunnel….
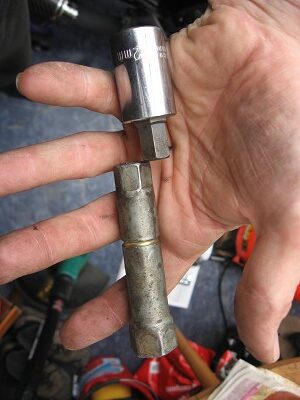
Ha Haar…I can now gain access to the shims that need changing, which I shall need to measure in order to ascertain what thickness will need to go back in to give me the correct gap. To get the shims out I used a telescopic magnetic pick up tool and a metal tooth pick, first I used the magnet to stick to the shim and tried to lever the shim away with the tooth pick but in the end I found it easier to lift the shim and the bucket it sat in out completely, this allowed me to get to work on it with more room etc. There are two cut outs at the top of the bucket and this is where you can gain access to get the shim out….be firm but careful, once out oil the bucket and pop it back in, only work on one at a time so as not to confuse where things came from. Now measure the offending shim with the micrometer (I found one that measure 0-25mm perfect for the job)
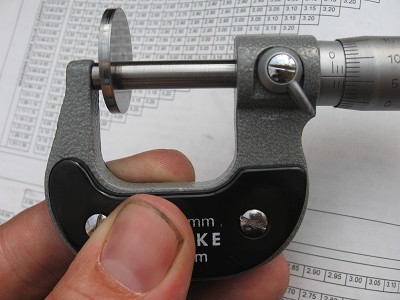
This one measured 2.56mm
Make a note of the thickness and pop it back into the bucket it came from, repeat this for all the out of spec shims. You will now have all the information you need to work out what thickness shim will need to be fitted to rectify the gap to within spec, Haynes has a table where you look up measured gap against measured shim, where the two intersect it tells you the thickness of the shim that should be fitted, alternatively you could work it out by
Gaps that are too small….
The difference in the measured gap to the gap required
Minus
The measured shim thickness
Equals
The shim required
Gaps that are too large…..unlikely but
The difference in the measured gap to the gap required
Plus
The measured shim thickness
Equals
The shim required
Now I ended up having a bit of a run around as my Triumph dealer gave me the wrong thickness shims ( note to self take micrometer and double check everything before leaving the shop! ) that was about a 75mile round trip, so I wasn’t best pleased, after a bit of surfing I found out that the 25mm shims that are fitted to the early Triumph triples and fours also fit the Yamaha FJ1100/1200, XJ600 & Vmax,XT350 etc plus nearly all the early Honda CB Range 750,900,1000. This opened up how I could get some and a call to my local bike shop meant I could pop round with my micrometer and sort some out to fit….yehaaa
I got back popped them in making sure they where seated flush and started to reassemble the camshafts back into the engine. First move was to get my trusty oil can…
Get one they are as cheap as chips
and give all the shims and bearing surfaces a good squirt, check the T1 mark on the ignition rotor was still aligned with the pick up and slipped the exhaust cam back in (you can tell it’s the exhaust cam because it doesn’t a grove in the center and the inlet cam does)
Not a fantastic picture but if you look carefully you can see the difference
I hooked the cam chain over the sprocket loosing the piece of wood at the same time. The chain needs to be taught between the crankshaft sprocket and the exhaust cam shaft sprocket with the arrow on the sprocket facing inwards level with the head as before. Place the inlet cam in and position it with arrow facing inwards and the chain hooked on the sprocket with no slack……here is another more detailed pic of the timing marks and how the should be….this is important, if this is not achieved bad damage could occur when you start the engine !
Insert the cam chain tensioner back into the head and tighten up the two mounting bolts to 9NM, squirt a little more oil on the camshaft journals before the cam caps go back on, put them on one shaft at a time in the right order, tighten them in a criss cross as before, tighten them down to 10NM, I couldn’t fit the torque wrench on the closest bolt under the frame on the inlet cam cab bolt ??! so I had to guess it….not too happy about that but I think I got it about right. Put the cam chain tensioner spring and bolt back into the tensioner body and wind the bolt in, you will hear the tensioner click into place, tighten the bolt up to 23NM. Place the cam chain upper guide back and tighten the four bolts down to 12NM.. Double check everything as you go…. This procedure took me a few attempts as things moved, fell off and generally misbehaved but perseverance won through in the end. Once it’s all back recheck your clearances just to be sure your calculations have given you the correct gap.Wind the engine over by hand a few times so that everything is ok and you are happy with how it’s all set. Double check the timing marks are correct. Replace the crankshaft end cover back with a new gasket, tighten the bolts up to 9NM.
Now is a good time to put your spark plugs back in, torque them up to 18NM
I had cleaned the silicone sealant off the head, the cam cover and gasket the night before…I scraped and picked and wiped it down with solvent until all trace had gone, brake cleaner is good for the final clean up, spray it on a rag first though..
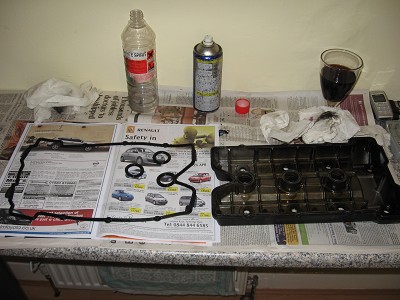
The red wine is no good as a cleaner by the way…
You need to stick the rubber gasket back onto the cam cover, use the sealant very sparingly, on the outside edge of all the surfaces to be stuck, press it all home. Apply very sparingly! sealant to the half moon cut outs and round to the corners on the head at each end, apply it to only half the width of the surface towards the outside edge. This stuff will get everywhere unless you are careful with it !
Slide the cover back into place, as I said going in at and angle to help avoid the cams catching on the half moon projections on the gasket, it is a tight fit but I got it in in one….nothing was stopping me now !!
Torque down the cover bolts in a criss cross to 10NM,
Then it’s tank on bodywork on etc and time to start the engine….., I’m pleased to say all was well it now runs better, sounds better etc….
This is also a good time to balance the carbs if you want….I did and wrote it up if you want to have a look