A “how to nail this sucker for good”. This work was carried out by Dave (NX5L) over on Triumph Rat.Net his detailed and informative write up is excellent so to save it being lost in the forum over there I’ve ok’d it with him to publish it here….
Might be worth looking at Clutch Push Rod in the menu too as this covers areas connected to this work 😉
The majority of the oil leaks on the T3 are found in or around the sprocket side cover area. There are multiple oil seals here and a few o rings that all have the potential to leak, particularly on higher mileage bikes like mine. Of these items, a quick scan through the archives had revealed each one of these causing an owner a problem at some point. Since I didn’t really know what was leaking, I figured it would be best to address the most common items. In the process of sorting this out, I put the major infraction causers together in one post with pictures.
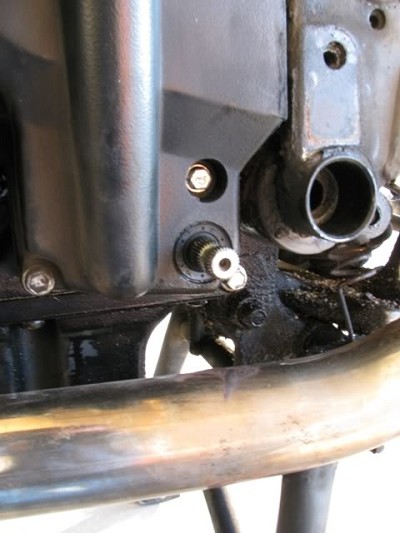
I won’t bore everyone with the detail of removing the sprocket side cover. You can probably figure out on your own what parts need to come off and what parts need be relocated get access to the sprocket side cover. With a few parts removed, you can now see one of the potential sources of an oil leak …the gearchange shaft seal. It’s a 12mm x 22mm x 7mm double lipped seal. You can source your own metric seal or you’ll need to order part 3600008-T0301 from Triumph.
Once you remove the sprocket side cover, this is probably what you’ll
see.
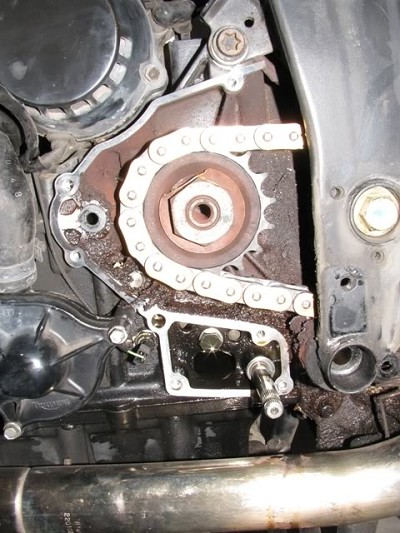
Lots of grime gets built up here and of course, lots of grime on the inside of the sprocket side cover. You’ll spend a bit of time removing all the grime and since it’s quite nasty in here, you should wear some disposable gloves to make life easer.
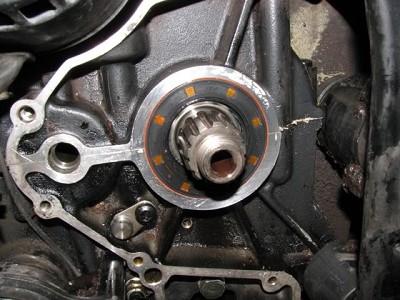
There are a few things to point out in this picture. One is the second source of an oil leak, and that is the clutch pushrod oil seal, which is located just to the left of the chain / sprocket. I’ll get more into this area later on. This seal is an 8mm x 16mm x 6mm double lipped seal. Source your own replacement seal or order part 3600012-T0301 from Triumph. The third source of oil leaks is the transmission output shaft seal, located directly behind the small sprocket. It’s a 40mm x 62mm x 6mm double lipped seal. Source your own metric seal or order 3600112-T0301 from Triumph.
You need to remove the chain and sprocket to get access to the output shaft seal.
Now that the chain and sprocket is removed, you can tackle removing the seals. First up, the clutch pushrod seal.
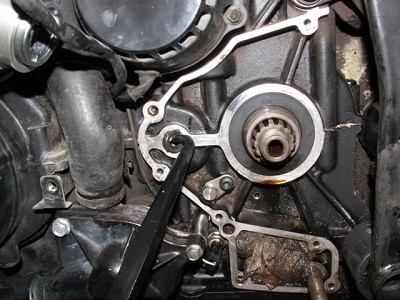
Remove the output shaft sleeve to give yourself access to the seal…
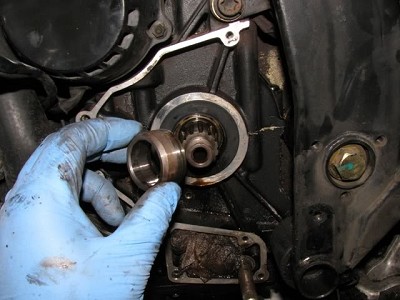
Then remove the output shaft seal

Here is a tip I picked up from doing this exact job on my old Yamaha XS650 back in the 80’s. When replacing seals such as this, its not a bad idea to apply a thin coat of silicone sealant to the outside surface of the seal where it seals to the crankcase. Yamaha recommended applying sealant like this to prevent oil from bypassing the seal. There is no harm done in doing the same in this application, so I applied sealant like this.
The seal can be pushed into location with nothing more than thumb pressure.
Repeat the same steps for the clutch pushrod seal and the seal in the side cover for the gearchange shaft. You’ll also want to lube the lips of the seals with clean engine oil so they aren’t dry when called into service for the first time.
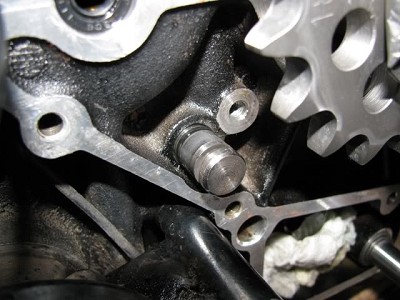
The fourth and not so obvious source of an oil leak can be found with the o ring located the selector shaft. Most people don’t know this o ring is here and it can be a source of mystery oil leak when nothing else seems out of place. Jumping to the end of the story for a second, this is one of the mystery leaks I had on my bike.
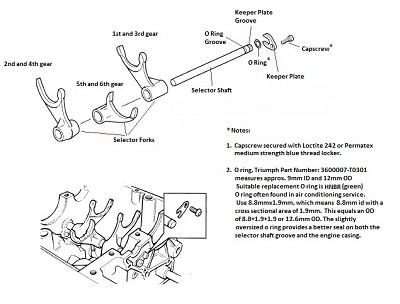
CAUTION CAUION CAUTION. Before you replace this o ring, you need to understand the risk that is involved with this step. The selector shaft in the above picture holds the three shift forks which allow your transmission to shift properly into the appropriate gear. Normally, the shaft and selector forks are accessible ONLY by splitting the case to get inside…a major task for a backyard mechanic. It is possible to replace this o ring without removing the engine and splitting the cases, HOWEVER, you must be extremely cautious and work to remove the seal with a self imposed limitations. If you make a mistake in the procedure, you run the risk of dropping 2nd and 4th gear selector fork off the end selector shaft into the engine, necessitating an engine removal and case splitting to repair.
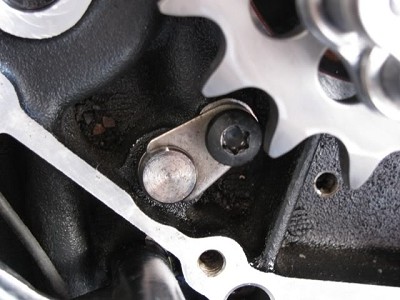
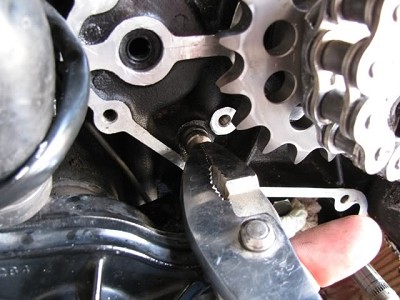
Start by removing the torx capscrew that secures the retaining plate holding the selector shaft.
SLOWLY and CAREFULLY withdraw the selector shaft with pliers about 10 mm…just enough to expose the o ring…and NO MORE. The shaft is a fairly loose fit, with the only significant resistance felt coming from the o ring. In other words, you won’t have to fight to withdraw the shaft. If you notice any significant resistance, try rotating the selector shaft with pliers first and simultaneously pulling back. Remember, only withdraw the shaft enough to expose the o ring and no more
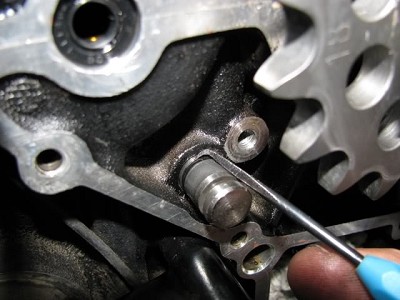
Now that you’re committed, use a small tool to hook the o ring and persuade it to come out of its groove. I am not doing it in this picture because my left hand is holding the camera but how I removed the o ring and simultaneously prevented the shaft from coming out any further was to use my left thumb to supply back pressure on the shaft, while I used my right hand to wrestle with the o ring.

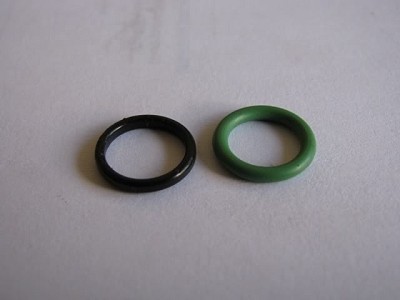
This picture shows what 50k miles does to this o ring. Notice both sealing surfaces are well worn and flat, giving the o ring a square profile. Next to it is a non factory replacement o ring I am replacing it with…an HNBR 8.8mm x 1.9mm o ring available in autoparts stores that carry air conditioning parts and seals. This particular o ring came from Checkers, an automotive parts store common here in the western part of the US. If you prefer, the Triumph o ring is part number 3600007-t0301, which is a 9mm ID x 12mm OD o ring.
Lubricate the replacement o ring and carefully install it on the selector shaft. Once in place in its groove, slide the selector shaft forward until it contacts the engine case.
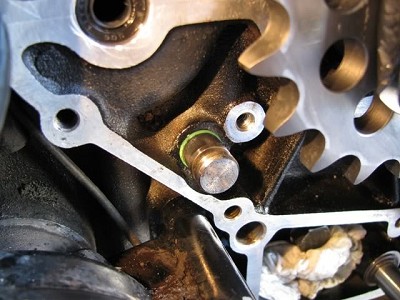
Using only pliers and gentle pressure, push the selector shaft inwards to force the o ring into its groove, positioning the selector shaft in its normal location. If it does not want to go, use nothing more than hand pressure with your free hand and tap the shaft in. The o ring will compress and the selector shaft will slide home. I had no trouble, but did have to slightly tap the pliers to slide the shaft into position with light hand pressure.
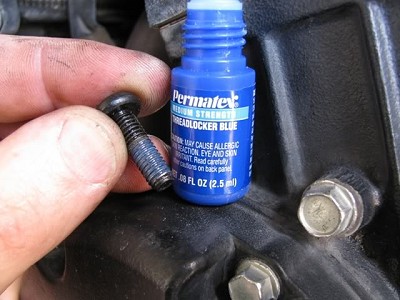
Secure the capscrew with medium strength thread locker and tighten to torque.
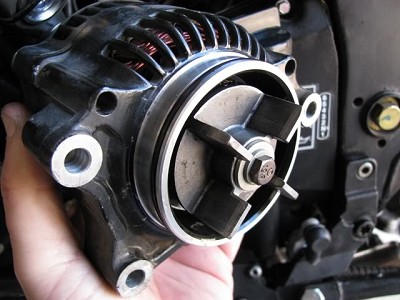
The fifth source of an oil leak is the alternator o ring. I apologize, but I didn’t get the measurements of the o ring, so the best I can tell you is to source the Triumph part, 3600100-T0301. If you’re in this far, you should check the tightness of the bolt securing the “impeller” to the alternator (ie. alternator rattle problem) and the condition of the alternator shock absorber cushions.
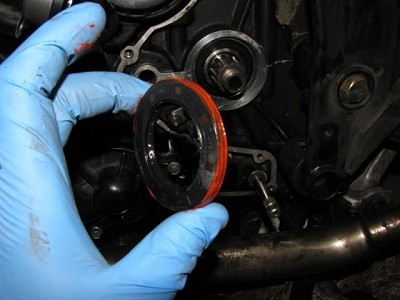
The sixth source of an oil leak is the side cover gasket itself. Make sure that all old gasket material is off of the sealing face of the side cover. It’s not called for in the service manual, but I always use very thin coating of high temperature silicone sealant when securing gaskets. You can just see some of the high temperature (orange colored) sealant in this photo on the backside of the gasket, sealing it to the side cover. I do the same to the face of the gasket right before installing it on the engine. Again, its not a factory recommended procedure, it’s a procedure I do for my own self assurance. Apply or not apply the sealant as you see fit. I’ll skip the reinstall of the new chain (just visible in this photo). I’ll cover that later as a separate project writeup.
As you can see Dave has done an excellent job
Please also see Clutch push rod in the menu as this covers areas connected with this work
Cheers
Mot