A regular culprit of oil leaks is from the clutch push rod seal behind the front sprocket cover. It is an oil seal designed for a rotary action not a linear in out action, after having a few leaks over the years I was looking for a better fix. I mean they aren’t expensive or too difficult to do, it’s just a pain and riding home with oil on your boot/rear tire isn’t fun !
After some research I found a mini fork seal that is designed for the work load our clutch push rod would put through it, one potential point of trouble being it is somewhat deeper than stock. Not to be put off I fitted it and seated as deep as it would go, it does sit a tiny, tiny bit proud but this just serves to create a better seal between the seal face and the sprocket cover which was a bonus. I have used them now for thousands of miles and so far not had to replace so the “trial” is going well, it’s something I would recommend as a service/preventive maintenance item when next having to get the sprocket cover off.
It’s an 8x16x9TC4 seal ie. 4 lips seals plus has internal support for the clutch push rod where as the stock seal is a 8x16x6TC ie. a twin lipped oil seal no support available only from Simply Bearings as far as I have found out I’ll pop a link below
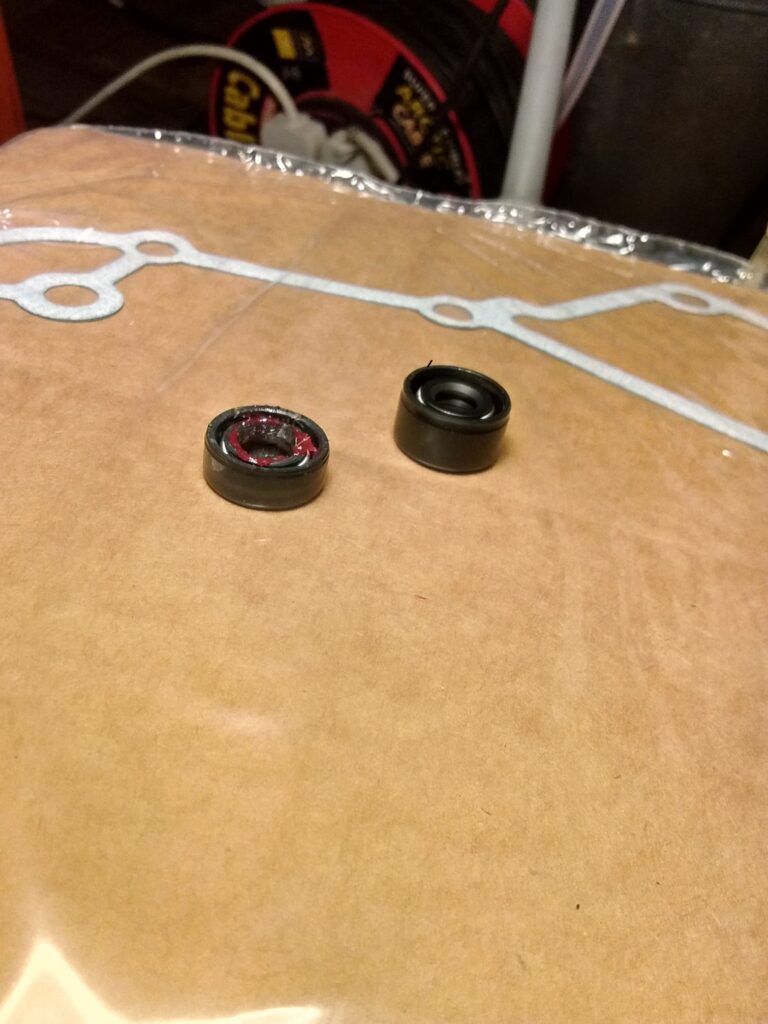
Stock on the left upgrade on the right
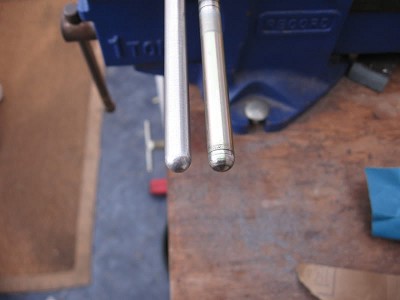
Ok enough of that next culprit is the clutch push rod itself ! The finish on them isn’t marvelous and the diameter of them is a bit off if you ask me ? It does the job most of the time and I’m sure is similar as fitted to lots of bikes but we could do better so I bought a length of silver steel to make one with. Silver steel is engineered to a better tolerance and you can buy off the shelf in different shapes and sizes. this was a 1 mtr bar of 8mm round silver steel enough to make two clutch push rods.
I had already been using the old trick of flipping the rod to give a fresh area of rod at the seal, here you can see the wear mark

New rod next to it for comparison, the new rod I simply cut to length then set about it with a file first and then various grades of sand paper to profile the ends into the same round as the original

And the result after many years is good it’s cheaper than a Triumph part and better quality which is a win win for me.
Lastly and nothing really to do with the above apart from the word “clutch” in it was an easy upgrade of the original clutch springs. Mine either had a worn clutch, or springs, or both as when hard on the power if the rear kicked off a bump it would shock the clutch and have it spinning for a second or so. My fix was to fit the clutch springs from the Daytona 1200 which are stronger.
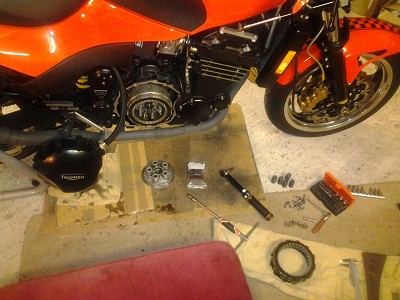
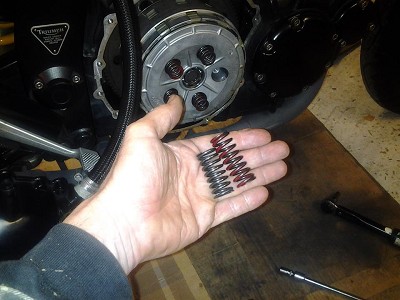
undo 5 nuts lift the springs and the clutch plates out in order and replace in the same way…you’ll note the 1200 springs are red and longer (ie stronger ) than stock…
Care is required when torqueing up the bolts as they are only 10Nm and easy to over cook it, I also needed to compress the bolt head against the spring a little to get it to thread so I used some kitchen towel in the socket to allow me to press it home whilst winding it on.