Useful tools
Torque wrench/s 9-100nm
Big hammer
27mm socket and spanner
Bike stand
Molybdenum Disulfide Grease
Grease Gun
General purpose Grease
Copper Grease
WD40
Paraffin
Lots of rags/kitchen roll
Torx head keys
Bit of scaff tube
18mm 1.5pitch long bolt or equivalent
Additions possibly required a vice and stuff to make a draw bolt for removing replacing bearings
To make a draw bolt: 10-11mm threaded bar repair washers nuts etc, also knocking the swing arm spindle through may need something about 10mm wide and about a foot or more long ! Assorted bits of wood are a bonus to support things…
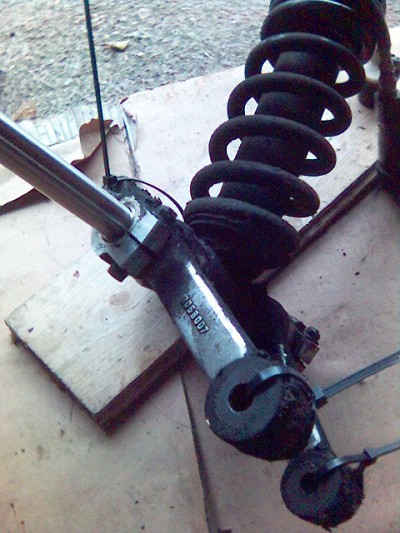
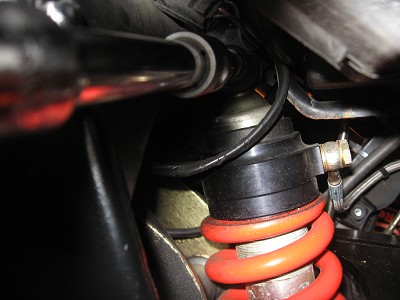
SO………Replacing the shocker and overhauling the suspension linkage Replacing Rear Shock On My ’95 Speed Triple
Time was due (well way over due..!) to replace the rear shock of my ’95 Speed Triple (S3), it had done 37K on the original shocker and things were getting bouncy. I didn’t have the money to get the rear shock straight away so thought I would use the time (and avoid the crap winter weather) by overhauling the suspension linkage and the swing arm.
First move was to get the bike up in the air to remove all the bits that needed sorting, I used an Abba Superbike stand with swing arm removal kit, this bolts into the 8mm bolt on the heel plates and works a treat. I had already read that using the center stand alone would not leave enough room to drop the shocker out below (as it needs to be ) so plan ahead for this and it will save a lot of swearing later.
I took the Haynes route and removed just about everything (I believe if just doing the rear shock you can leave all the body work and battery box in place but don’t quote me on that) seat, Body work, battery/battery box, Preload adjuster, Damping adjuster, Airbox Resonators Exhaust including the H connecting pipe but not the down pipes, Rear wheel and hugger Swing arm spindle caps, Rear brake line clip on swing arm.
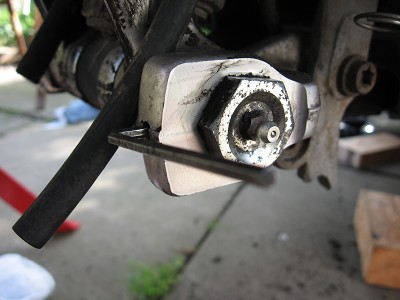
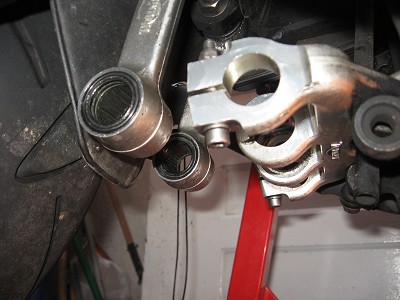
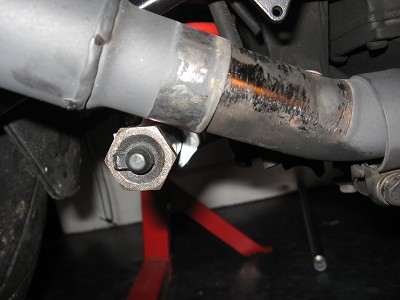
At this point I Removed the Linkage spindle cap bolt (which is a 27mm item) and loosened the Linkage spindle clamp bolts, note there are two types of drag link that clamp the spindle one is the pinch bolt type and one has grub screws
Later grub screw type
Earlier pinch bolt type
Then as the Haynes says remove the Spindle …eerrr…like no bloody way. I tried screwing the spindle cap back in a few turns, so it sat proud, placing a socket over the end and hitting it, I tried rotating the Spindle to loosen it, all no go so…Plan B…. I removed the Linkage arm connecting bolts and the Shock top mounting bolt and the linkage arm to frame mounting bolt and dropped the whole lot out the bottom so as to set it up to hit ten barrels out of it.
After some searching about I found something to screw into the end of the Spindle (which is 18mm with a 1.5 pitch ) which happened to be an old speaker stand from Ikea !! And set it all up so I could give it a whack.
Inserted bar
Taped socket over the end of bar and give it a clout
This worked, now I could dismantle the whole lot clean it up and see what was what.
If you do manage to get the spindle out whilst everything is still attached to the bike this will allow you to drop the shock out the bottom, it will only go so far until it butts onto the linkage arm..raise the swing arm and it will allow more room so you can continue to drop the shock down at an angle towards the rear of the bike.
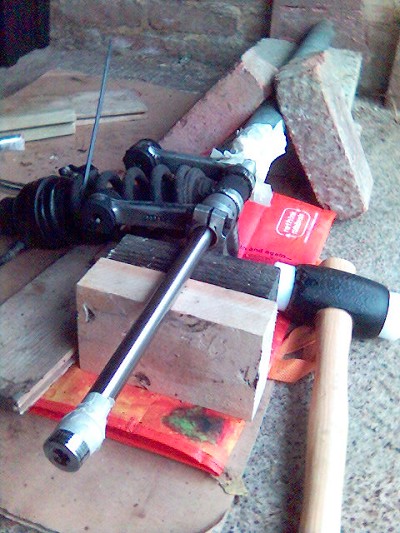
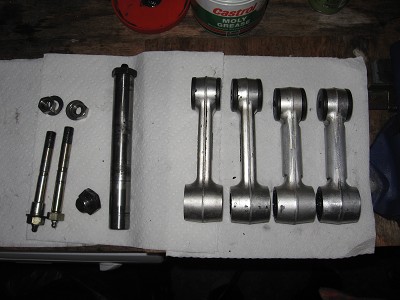
There was some corrosion on the spindle itself but nothing that didn’t clean up with a bit of 1500grade wet and dry, all the bearings were ok apart from the roller bearings in the linkage arm that connected to the frame, I ordered some up, plus a new inner sleeve as that was pitted too and set about removing the knackered ones. After a bit of thought I thought a draw bolt assembly would be best and set a vice up in my kitchen cupboard to have a go at it..
With a 27mm and 19mm “deep” sockets I was able to draw both roller bearings out of the linkage arm (beware this sounded easy but was a bit of a pig) It did require the use of a trusty bit of scaf tube to get enough leverage whilst winding them out and it also knackered a few bits of threaded bar in the process but perseverance won in the end. I used the same draw bolt assembly to wind the new bearings in and wham bam, twas done.
I replaced the grease nipple on the linkage arm and all the grease seals, cleaned out all the old grease and it was soon looking newish.

The swing arm came out no problems and all the bearings were OK so I cleaned and regreased it all replaced a couple of grease seals and shims that looked a bit naff and wrestled the thing back in…the problem being that the arm was a tight fit and this offset the grease seals when pushing the whole assembly back in, so the swing arm spindle would not go through…!! I found waggling the swing arm two and fro, whilst tapping the spindle gently made some progress… talk about what should be a simple job made F******* hard.
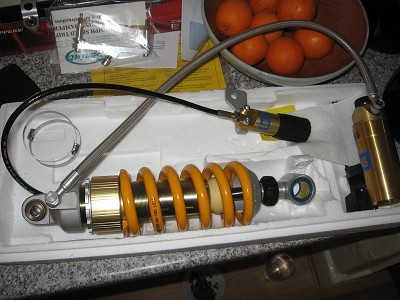
Xmas came and went, money did the same but a rear shocker had to bought and which one would prove a bit of a head spin…I narrowed it down to Techno flex (now no more and called Wilber), Ohlins or Hagon.
Wilber had high and low speed compression damping (remote) and was also adjustable for rebound and preload with screw driver and spanner. About 550 quid
Ohlins had remote compression and preload with a dial for rebound, about 550 quid
Hagon had dual compression/rebound and an option for remote preload, 255 quid bog standard 380 quid with remote adjuster.
Wilber did have other options also but I stopped looking as I had also tried a load more options and my head was spinning !!
I searched loads of times on the net to try and give myself a clue but it was all full of contradictions…people who had paid huge amounts raved about the improvements, but then if your old shock was knackered and you put 600 quids worth of new shock on you would expect an improvement…you would hope so ay…. Other folk said it was OTT unless you were riding regularly on the track or racing. At the other end people said that Hagon was no better than the original whilst others claimed a huge improvement..all of this was no help and in the end I realised that I would have to take the plunge and the decision was going to have to be mine, not having the insight of riding my bike back to back with different shocks fitted it was time to buy a …….
Hagon, I couldn’t justify the expense of the others…man that is one pile of cash for those names, I don’t race, I like to think that I ride quite well at a fare old lick on the road so Hagon it was. I also opted for the remote Preload as the misses likes to comes out from time to time plus it also removes that “I’ve got to remove the shock to adjust preload” or “I have got to destroy preload ring with hammer and screw driver” scenario.
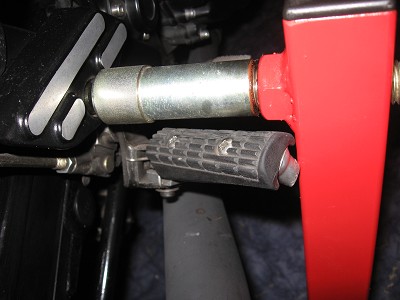
Mounted the adjuster on the footrest hanger like so
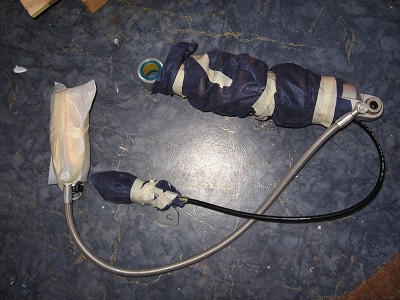
Every thing went back together well from here, I did find one tip to wrap the new shock in thin foam whilst wriggling it into place very helpful as there is not a lot of room and it would have looked very second hand if I had not. I replaced every thing I could for stainless fitted new grease nipple caps and things are looking good…
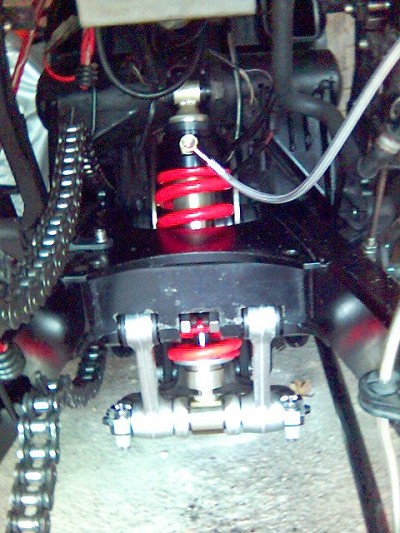
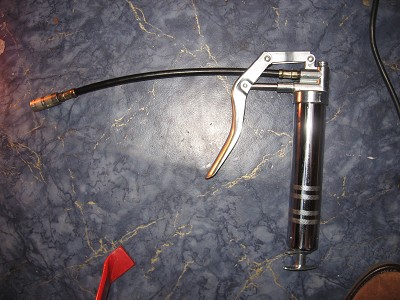
I have bunged everything else back on and routed all the tubes and cables, it’s worth noting that the bushes on the Hagon shock sit slightly proud and as such there is a warning in the box to only tighten the shock top mounting bolt to 40nm otherwise it may well crush it. Also there are five grease nipples to pump Molybdenum Disulphide grease into. One tip is to get a flexible hose for your grease gun, I found the standard metal one would not have enough clearance to fit the nipple under the suspension linkage arm that bolts to the frame, one like this worked fine though..
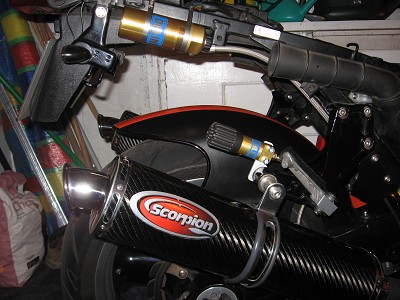
PHASE TWO !
Luck would have it I bagged an ebay NOS Ohlins so chopped out the Hagon here is how it went
Longer than the Hagon

The spec listed with the shock is as follows: Total length 327mm, Stroke 55mm, Preload 17mm, Rebound click adjust 12, Compression click adjust 10. I did read somewhere that the Ohlins off a ZX9R was the same spec…but at least with this info you could cross ref if a suitable came onto the market.
Fitting it was easier..mainly as everything came apart a treat, lovely isn’t it when you have stuff you can raise a spanner to and it all behaves ! After sticking it up on the ABBA super bike stand with the swing arm removal kit…this bolts onto the rear footrest hangers like so..

I removed the seat, rear body work, aux air chambers, battery box and slid the right hand can back to gain access to the linkage spindle…you could probably get away without removing the battery box etc but I found it easier to work with a little more elbow room.
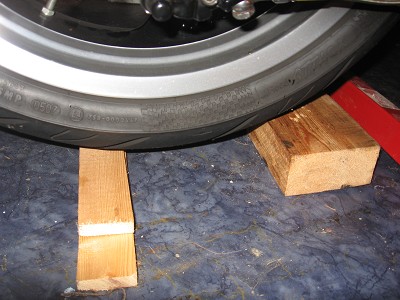
I supported the rear wheel to take the pressure off the linkage spindle..
then loosened of the top shock mounting bolt..
Loosened the linkage spindle clamp bolts and removed the linkage spindle end cap nut thing, removed the spindle and dropped the shock out through the bottom of the bike. The knack is to drop the shock as far as you can, then lift the rear wheel a tad (which of course raises the swing arm.) which then allows a little more room to wiggle the shock out.
I gave the linkage a quick clean up to save me from getting covered in grease but also to stop crap from getting into the bearings upon reassembly…ahhh looking right smart..

Getting the new shock in required the reverse of this process with a little more juggling to arrange the remote adjusters. To make sure I didn’t ruin the finish I wrapped everything in thin foam first as I had done with the fitting of the Hagon.
Bolting it all back together went fine and not forgetting to pump some fresh grease into the linkage now looks the bizz too, I’ll update this page with how it rides after set up soon..ish.
The owners manual states static sag to be set as follows:
Without rider (ie the measurement from when the bike is supported off the ground with both wheels fully extended on their suspension travel TO how far the suspension travel has compressed once the bike is lowered onto the ground with just the weight of the bike)
Rear…5-10mm
Front…25-30mm
With rider (ie you get on it both feet on the pegs someone supporting the bike upright so you don’t fall over!! this measurement is the total travel from when the bike was supported off the ground)
Rear…30-40mm
Front…35-48mm
You will need a friend to help with the measurements support etc. As for compression & rebound I’ll have to experiment with that..?
UPDATE UPDATE
Another ebay bargain god help me !! shorter drop links, these were fitted to an ex race bike. The result of fitting these is to pull the rear swing arm down and thus raise the rear of the bike resulting in better ground clearance but primarily a faster steering bike !
Good job I’m long in the leg because these raise the rear and therefore the seat height quite a lot !!