In a recent MOT it was noted that there was a tiny amount of play in one spot on the front wheel, not enough to fail the MOT but worth changing them sooner rather than later. Wheel bearings can grumble on for quite a while slowly destroying themselves or go in a sudden disastrous collapse, either way if they are showing signs of wear change them !
Always replace them as a pair….
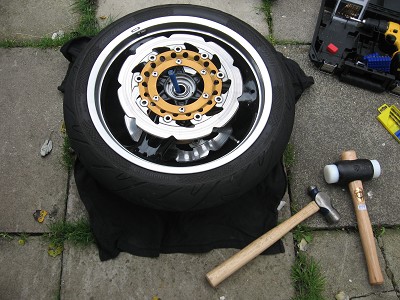
I had changed all the wheel bearings a couple of years ago when I had the wheels powder coated and polished, so luckily didn’t need to go out and buy any tools to do the job again. For the Front you will need…
Allen head sockets including a 12mm one
T55 Torx socket
Hammer ( a nice heavy one)
Torque wrench 10-60nm
Flat bladed screw driver, Philips head screw driver.
Pair of internal circlip pliers
A metal punch or drift
A 34mm impact socket
Some way of raising the front of the bike (to remove the front wheel) I used a trolley jack and an ABBA stand
Couple of bungies
Tub of general purpose grease
kitchen roll
Blocks of wood
Lump of scaff pole pole (optional)
Wheel bearings (Code on the box says Koyo 60052RSC3FGGSR, and on the bearing says 600SRS if that helps ?!)
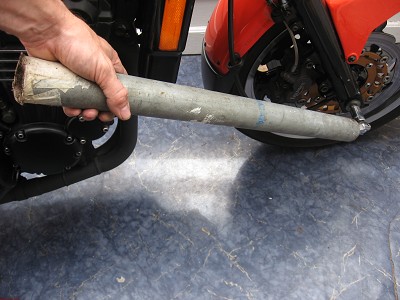
Before you do anything pop the new bearings in the freezer (it makes then a lot easier to fir as they shrink), then the next step is to loosen the axle nut, I use a breaker bar connected to the 12mm allen socket and a length of scaff tube to add a bit of leverage, this makes light work of it.
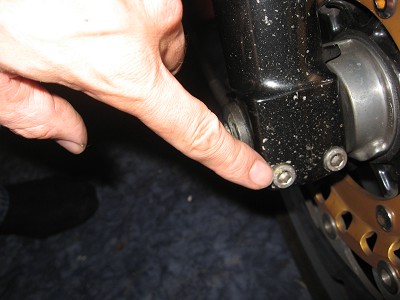
Next loosen the axel clamp bolts they take a 6mm allen head socket..
Remove the brake calipers and support them with a bungies, you need a T55 Torx socket for this..
Remove the speedo cable from the drive at the wheel..
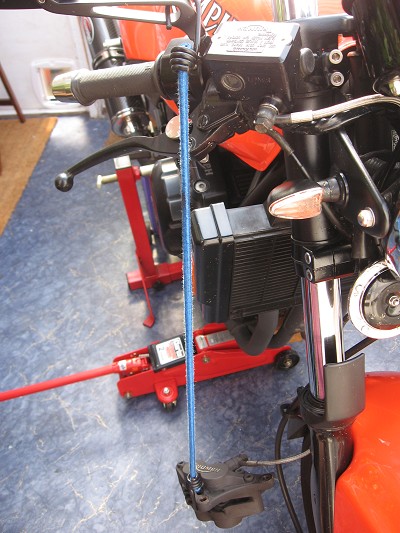
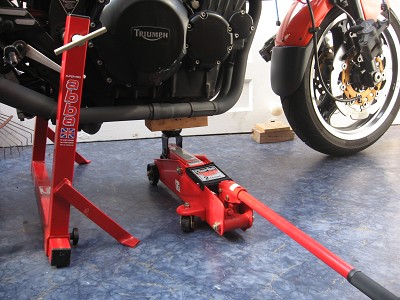
You are now ready to lift the bike so that you can remove the front wheel, I use an ABBA super bike stand to stabilize the bike and lift the front with a trolley jack with a lump of wood under the front of the engine like this..
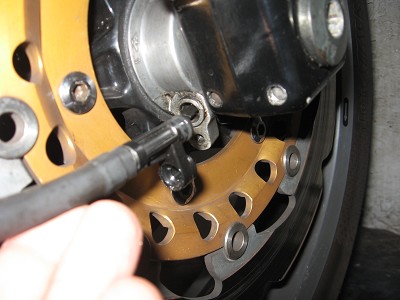
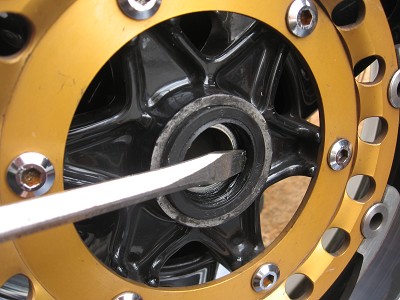
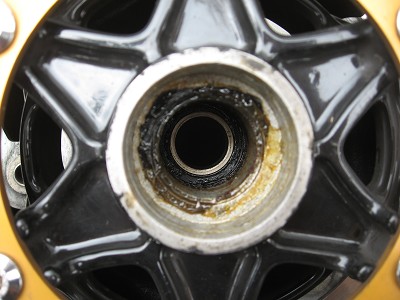
You can now undo the axle nut completely, slide out the axle and remove the front wheel. Once you’ve got the front wheel off remove spacer from the left hand side and the speedo drive from the right, this will allow you to be able to pries out the seals with a flat bladed screw driver..
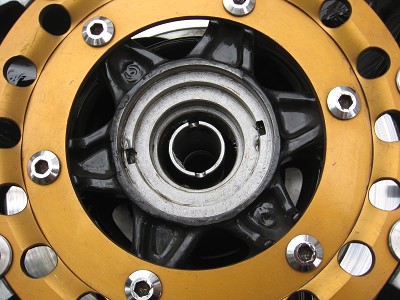
Then you can lift out the speedo drive flange and remove the cir clip form the other side with your internal cir clip pliers..
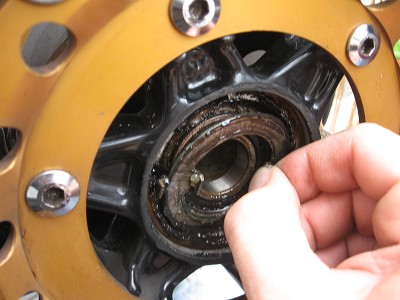

As you dismantle everything clean it up along the way with some kitchen roll or rags, it will allow you to apply fresh grease on reassembly and also properly inspect things as you go along.
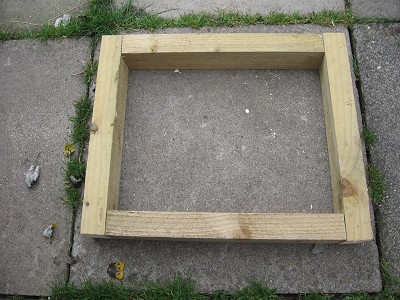
The wheel is now ready for you to attack, to be able to put the wheel on it’s side and hammer out the old bearings you will need to be able to support it off the ground so that the brake discs are protected, I made a frame out of 4×2 inch timber. I cut four lengths of 17inches and screwed the ends together like this
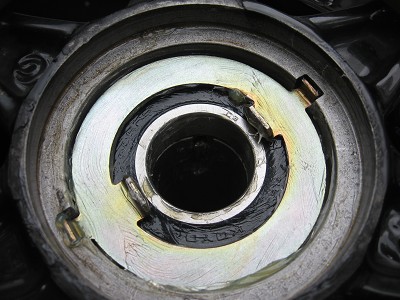
With some old rag over it you can lay the wheel down safely and get to work with the hammer and punch/drift. If you look through the axle hole you will see a couple of small cut outs in the internal spacer that will allow you to locate the drift on the inside race of the opposite bearing and tap it out..two pictures here try and show this one with the drift in place in the wheel and another as to how it is in the wheel if you see what I mean..?
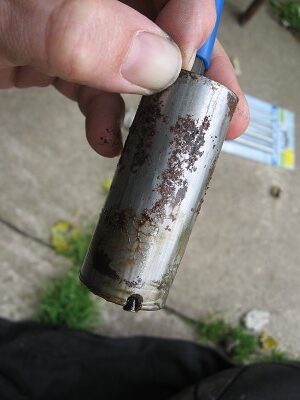
Tap the bearing out by hitting it evenly through the two cut outs in the spacer, when the bearing is free it will fall away and the spacer will go with it, retrieve and clean these then flip the wheel over and knock out the other bearing, you will now have loads of access to the inner race of this one like so..
Once they are both out you are ready to put the new bearings back in, clean the areas on the wheel to take the new ones and apply a smear of grease, take your bearings out of the freezer and remove one from the box, smear a small amount of grease over it the locate it in the wheel, take your 34mm impact socket and gently tap it home until it is flush. Flip the wheel over and insert the spacer in (don’t forget this bit !!!!!)..

You are now on the homeward straight, bearings in and ready to reassemble the rest of the wheel, grease everything, cir clip back in the left hand side, drive flange for the speedo which has the contact lips facing outwards, tap home the seals on both sides, fit speedo drive noting that the drive plate has to match up with flange contact lips, spacer to the left hand side…
Refit the wheel back into the bike and refit the speedo cable and brake calipers, do all the nuts and bolts up finger tight.
Lower the bike then tighten everything up..
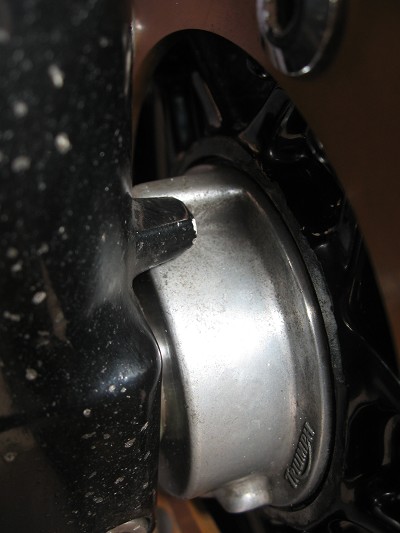
Note the speedo drive has a stop that needs to butt up against the stop on the fork leg like this..
Use a little thread lock on the speedo cable retain bolt…this will mean you don’t have to over tighten it which is all too easy, plus it saves it from undoing and you loosing your inner speedo cable whilst out for a ride !!