Two points that make this job slightly more convoluted than normal
- Is the sprocket cover is oil carrying so you’ll need to drain the oil to remove it
- The chain slider block swop is a swing arm out procedure
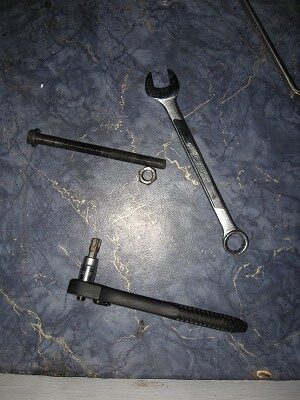
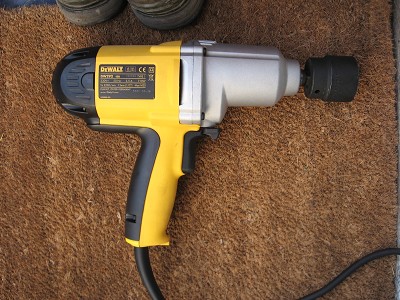
You’ll need a 36mm socket for the front sprocket bolt, various torx sizes (T55 for engine mounting bolt), possibly a make shift drift to remove the swing arm spindle, a chain riveting tool, torque wrenches (front sprocket nut is 132Nm !) and two things that will make your life a whole lot easier are an impact wrench and a grinder.
Oh and don’t skimp on a chain tool…the one mainly featured in the pictures is made out of chocolate ! I subsequently use one from a company called CEA which has been superb, it even gives me a torque setting for the bit that flares the soft rivet in the joining link, therefore taking out any of the guestimate as to whether it’s done correctly or not.
Anyway on with the job. You’ll need a stand that will allow the swing arm to be removed the, Abba Stand has a removal kit for this which bolts into the footpeg heel plate bolts. Once we get half way through the work when the chain is split it’s possible to remove the swing arm and do the slider block. If you are just doing the chain and sprockets skip this bit and just see the rear sprocket work
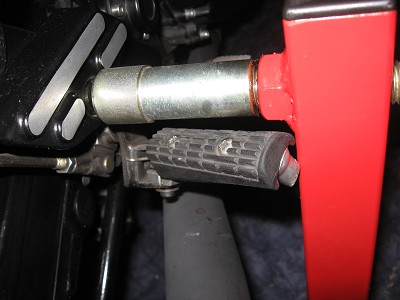
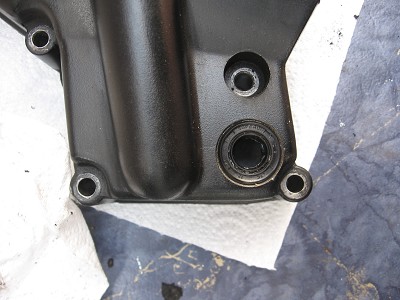
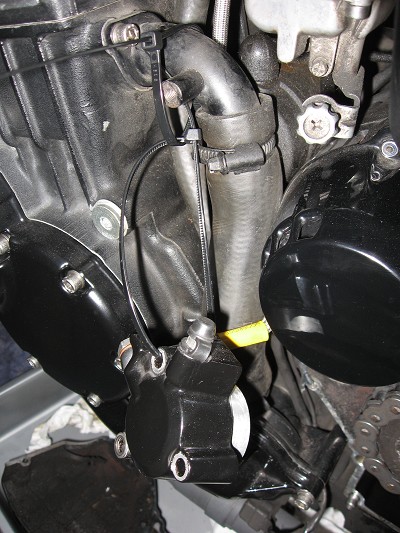
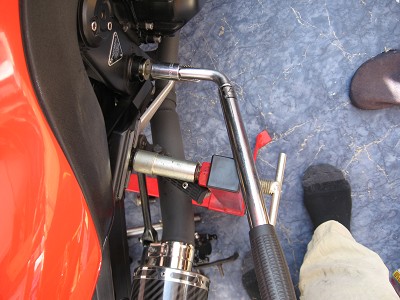
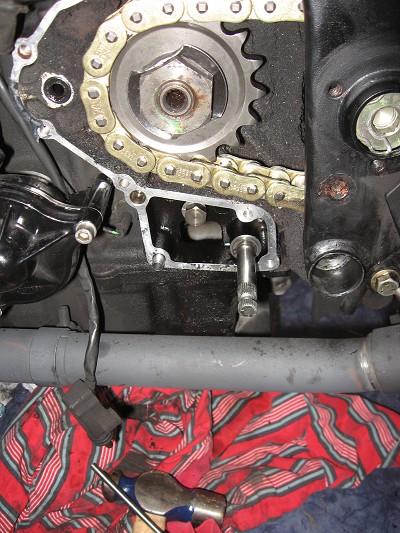
I want to get to the front sprocket retaining nut first with the chain still in place that way I can lock the chain and sprockets in place you get enough purchase on the front sprocket nut to undo it. So it’s oil out, front sprocket cover off. We need the clutch slave unbolted and put out the way
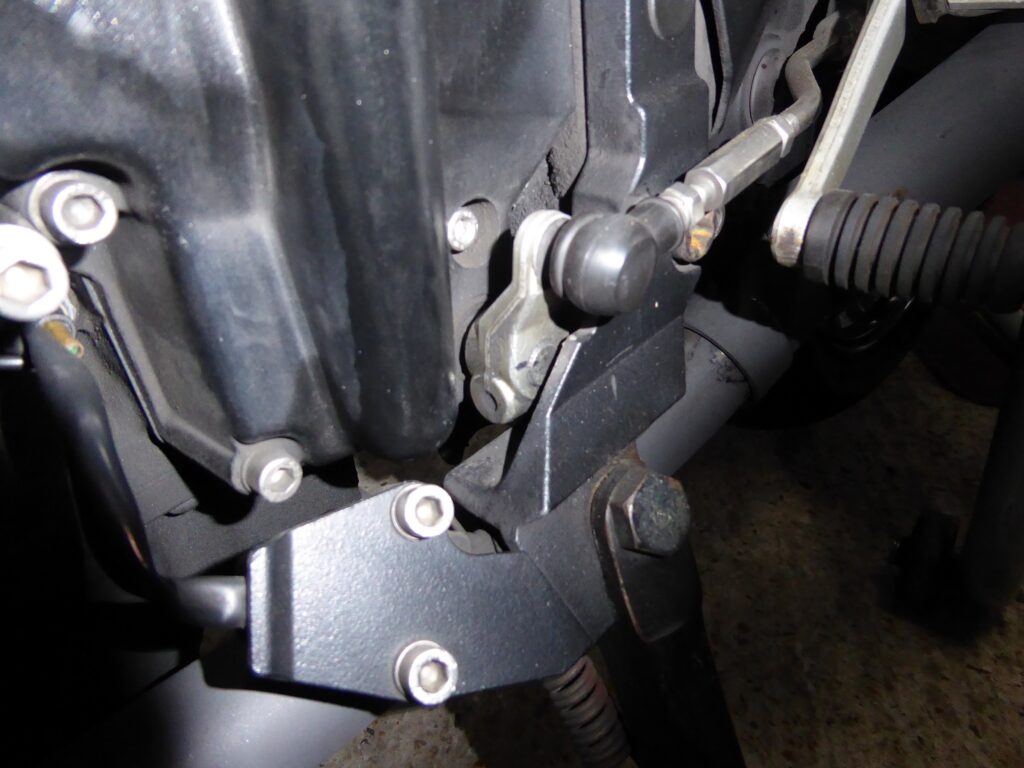
plus the gear shift linkage undone and arm that connects the the gear box output removed
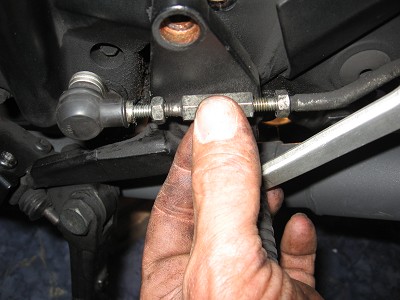
I tend to mark the end of the gear shift arm with a Sharpy so relocation onto the right spline when I reassemble is easy
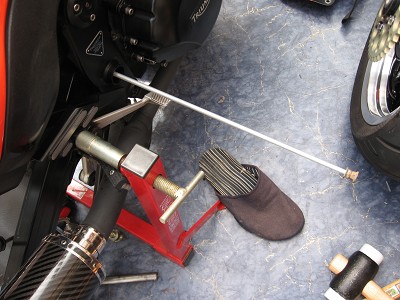
Next is the side stand so both retaining bolts need to by undone as per page on side stand upgrade, but will recap here to save annoying you 😉
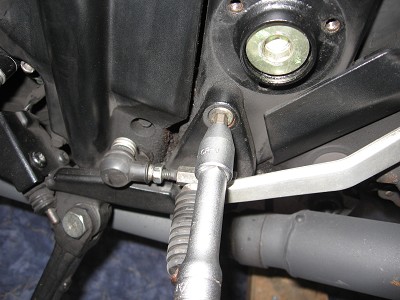
Once all that is out the way and your sprocket cover is off you have access to knock the tabs back on the security washer for the front sprocket

Ready for your very good friend the impact wrench with a 36mm socket on to whizz it off in short order. If however you chose to do it manually, you’ll need the bike in gear with a fat friend sitting on it, preferably with the front wheel against a wall whilst they press down HARD on the rear brake. You on the other hand will be busting a nut on the end of a very long bar wondering what will give first !!!
honesty buy, beg or borrow one
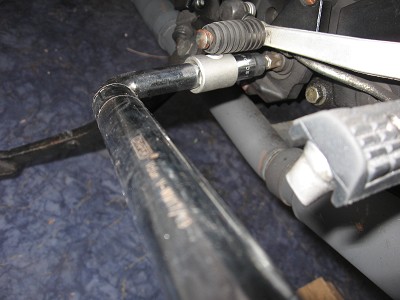
Now you have loosened the front sprocket nut you can split your chain. We have two methods on offer, one is a faff and laborious and will probably break your chocolate chain tool ! The other is swift, efficient and satisfying !
First way is to file off the head of the rivet you want to push out to break the chain
Then push out with your chain tool
The other is take your other very good friend the grinder, place something behind it to protect and just cut through your old chain
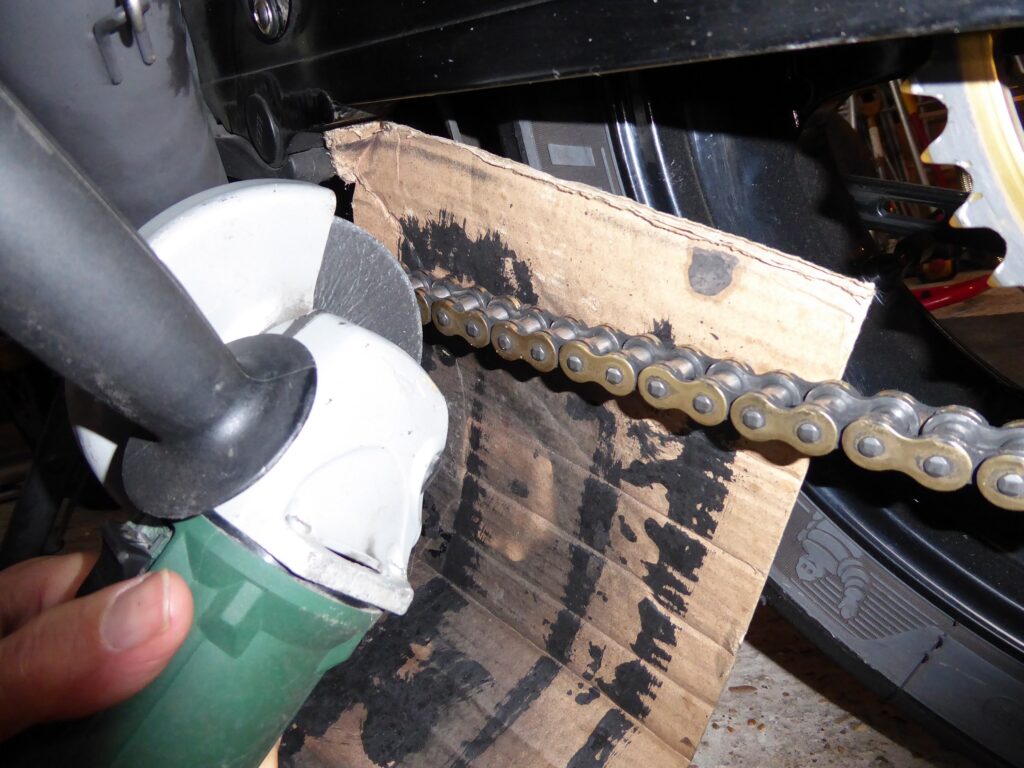
A piece of wood is better than the flimsy card I have here…depends how violent you are that day I guess 😉
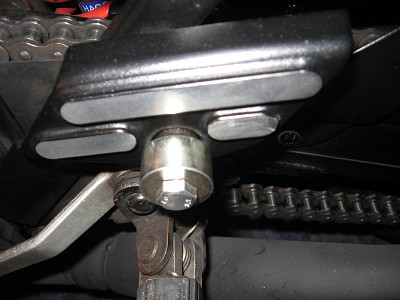
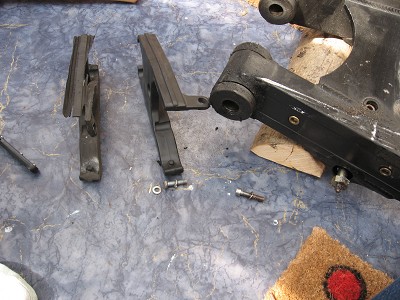
Pull your old chain through and off. Now you can remove the rear wheel and remove the swing arm for the slider block replacement. Remove the hugger and the rear brake hose retaining clip on the inside of the swing arm. Disconnect these parts of the suspension linkage to free it up ready for removal
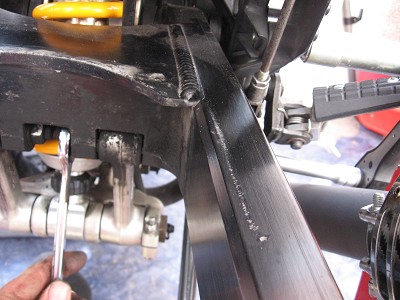
Undo the swing arm spindle bolt (12mm allen key required), to aid removal and installation of the swing arm it’s a good idea to loosen the lower engine mounting bolts, in this case we already have the LH one removed so the RH hand one will need backing off
I used a piece of bar through the spindle to help knock it through
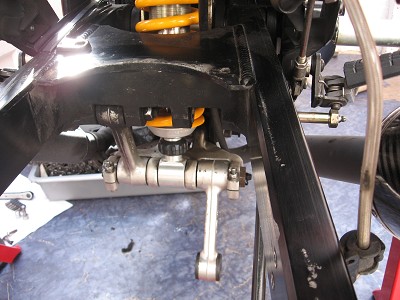
Once the spindle is out you can manipulate the sing arm free. NOTE there is a central aluminum spacer on the swing arm that spaces out the swing arm at the bike end.
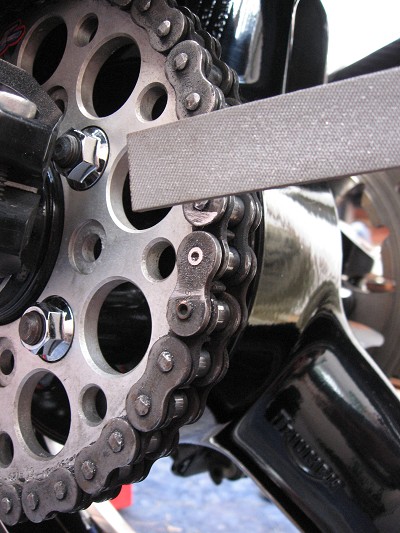
Removal of the slider block is straight forward with a couple of small torx bolts
Good time to have a clean up! it’s a little bit of a juggling act getting the swing arm back in as you have dust cap grease seals that may want to escape and dash your efforts
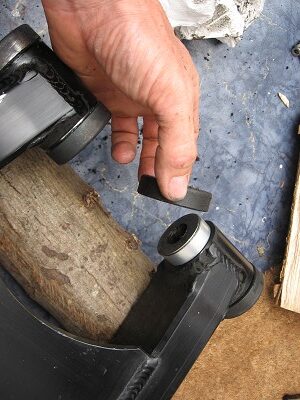
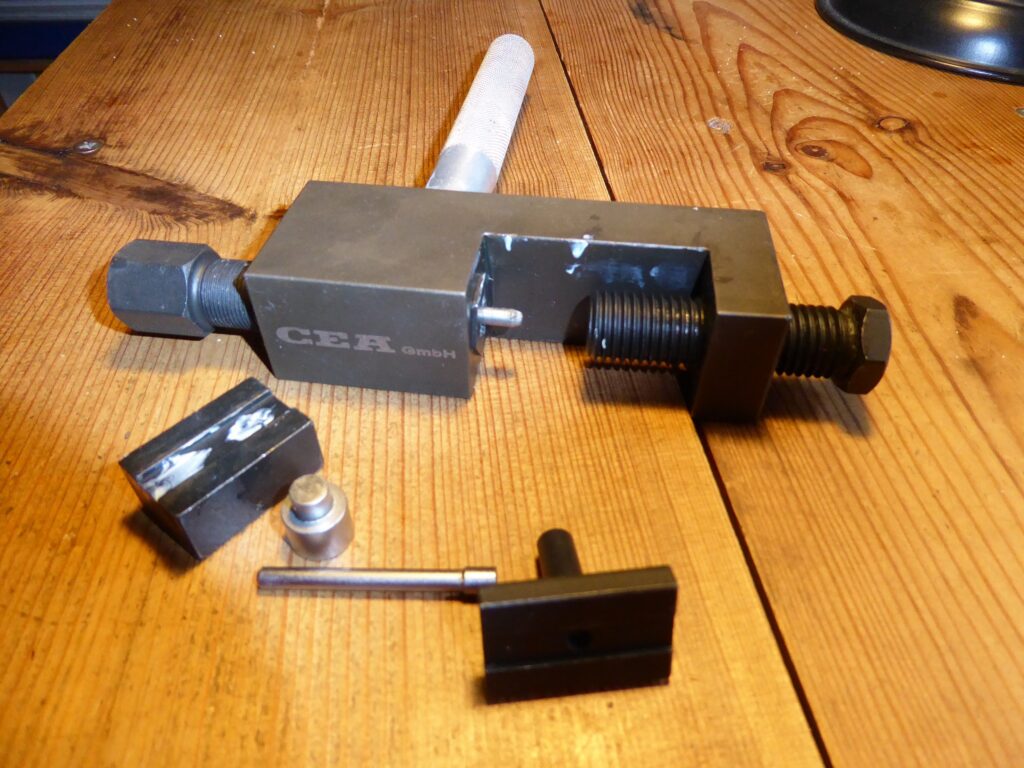
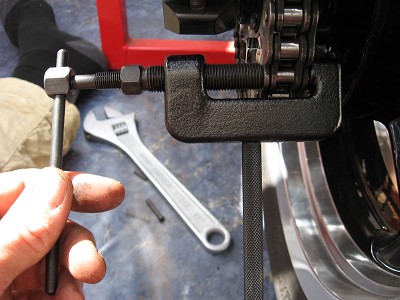
This next process can go swimmingly or turn into a bit of a struggle, to get the swing arm spindle back in there is a tool that will help align the various parts as it progresses through. Now is a good time to remind you NOT to forget the central aluminum spacer !
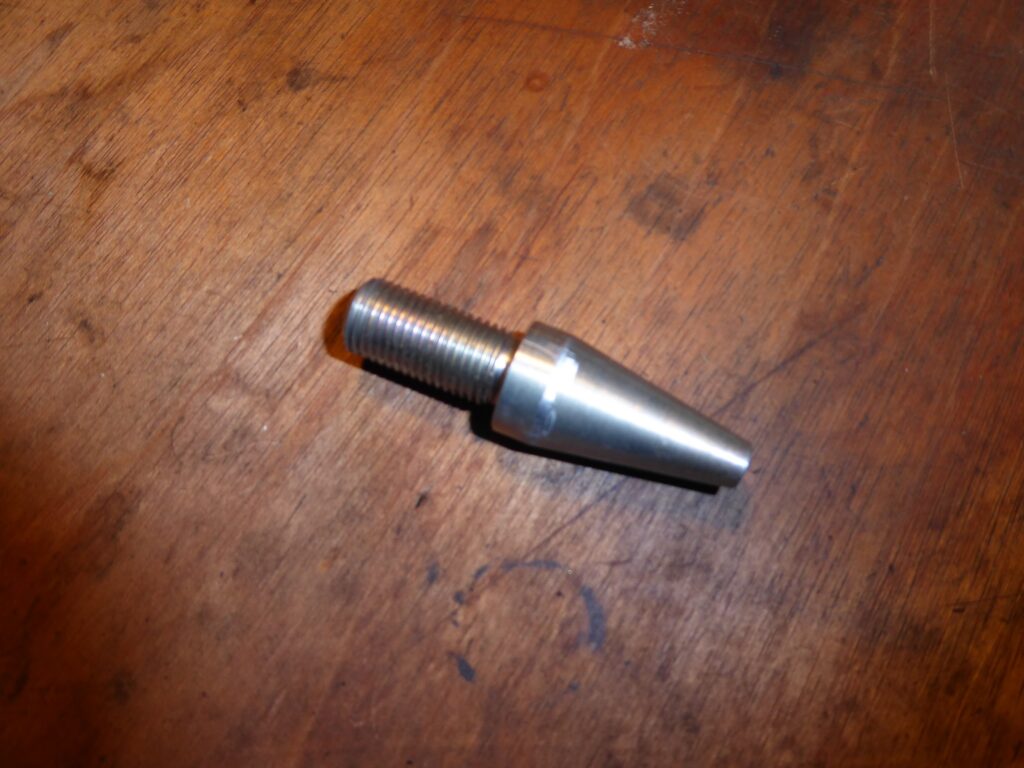
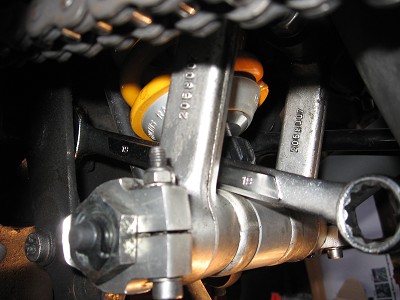
This the tool that simply screws into the spindle, the spindle nut tightens to 85Nm
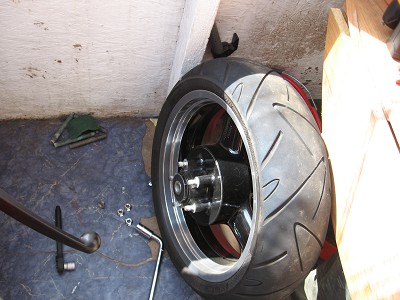
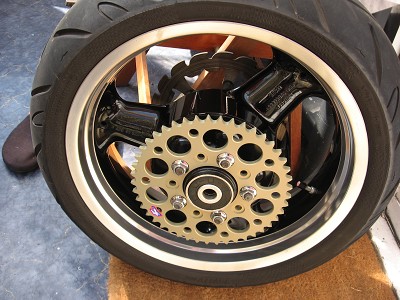
Now to catch up where we where with your chain, as the swing arm is now back in and everything attached back so we need to fit a new sprocket on the rear wheel.
Butt it up against a wall and with your knee on it (or better still use your newly acquired impact wrench) loosen off the sprocket nuts and remove the old sprocket. Pop the new one on, this is a 45tooth up two on the stock gearing and will give a little more pep in acceleration. Tighten the sprocket nuts to 85Nm
With your wheel back in feed your new chain around and on. Ready pop the O/X rings on and the press on the side plate of the joining link and flare the heads of the soft rivets correctly.
I could write another page on this part alone as there are different links ie: hollow and solid, various pics of exactly how it should be done etc. If you have a good chain tool it will make the whole job a lot more accurate and easy. The CEA one I have has a dedicated bit for getting the side plate on to the correct depth and also a dedicated punch for flaring your chosen brand of chain link. It’s dare I say it almost fool proof ! I always use DID chains so I have the same method of securing the joining link.
OOh look it’s on
Tightened up with the aid of a friend on the rear brake to 132Nm and the tabs on the security washer knocked over.
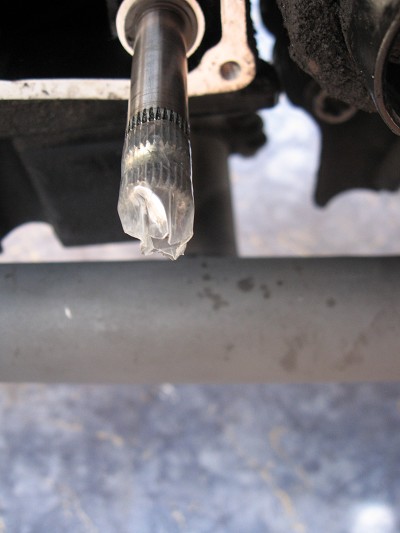
I normally replace the gear shaft output seal when ever I have the front sprocket cover off
to aid the shaft to pass through the seal without damage a little tape can help